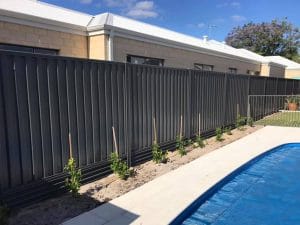
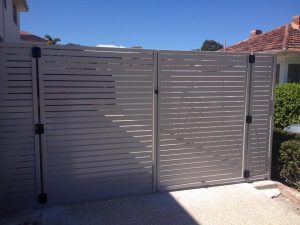
If you’re looking for Colorbond fence installation, Perth-based Maher’s Fencing provides a complete service to suit the specific needs of our customers. You can be assured that when you buy from us you’re getting only the best official Colorbond fencing that’s built to last. Unlike some other fencing contractors, we never use cheap painted steel. You can always be reassured that your fence is the best quality possible when you choose us for your installation.
When it comes to installing a retaining wall system for your fencing, if you have the knowledge and expertise, you can have a go yourself. However, it’s often easier to call in the professionals instead. A fencing specialist will be able to talk you through your options to help you get the best options for your needs. With this in mind, let’s take a brief look at the process of building a 0.6-metre-high retaining wall using GramLine or Ally Wall plinths.
- Set the line after gathering your materials. You need 3-metre-long Colorbond posts, galvanised steel posts for extra strength, concrete, retaining panels such as Gramline or AllyWall. You also require Colorbond sheets, Colorbond rails, backfill material (if needed), Metal Tek screws, string line and ground pegs for marking the fence line and posts. Next, you need to set the line to create a guide for installation.
- Time to dig the post holes. Once you have everything else in order, it’s then time to dig the post holes so you can fit in the Colorbond steel retaining wall posts.
- Align and install the posts. Get your spirit level out then insert and align your posts. Affix the Colorbond bottom rail, then the top rail 2mm above the post top to minimise sharp edge risks. Keep going with this until you get the right fence length. The rails will act as a stabilising frame during concrete pouring. So, you should now pour the concrete into the holes then level it out.
- Almost there, time to install Colorbond plinths. After you’ve allowed the concrete to set for more than 19 hours, install the plinths. Put your first one into the right place then check everything is aligned correctly. If needed, you can use some packing material to make sure the plinth is level. You can then continue on.
- Finally, add backfill. Clean sand, crushed recycled concrete or gravel are all great for backfilling your retaining wall as they’re perfect for draining excess water. Do bear in mind that your Colorbond rail needs to be 50mm from the ground so it doesn’t rust. Also, remember to hose down the sand along the wall to help it compact. You may need to consult a plumber to see if soak wells are needed to enhance drainage. Without this, pressure can build and cause damage.
So, you see that there is a lot to take on when it comes to installing retaining under Colorbond fencing. You also need to ensure that everything is within building regulations. If you’d rather all the hassle was taken out of your fencing, just get in touch with the Maher’s Fencing team, the Colorbond fencing Perth experts.